First, create API keys in WooCommerce
1. WooCommerce / Settings

2. Advanced / Legaly API
Check the box "Enable the legacy REST API"
Click on "Save Changes"

3. Click on the REST API tab, and then click on the "Create an API key"

4.
Description - Enter the name of your store
User - Choose “admin”
Permissions - Select “Read/Write”
Click on “Generate API key”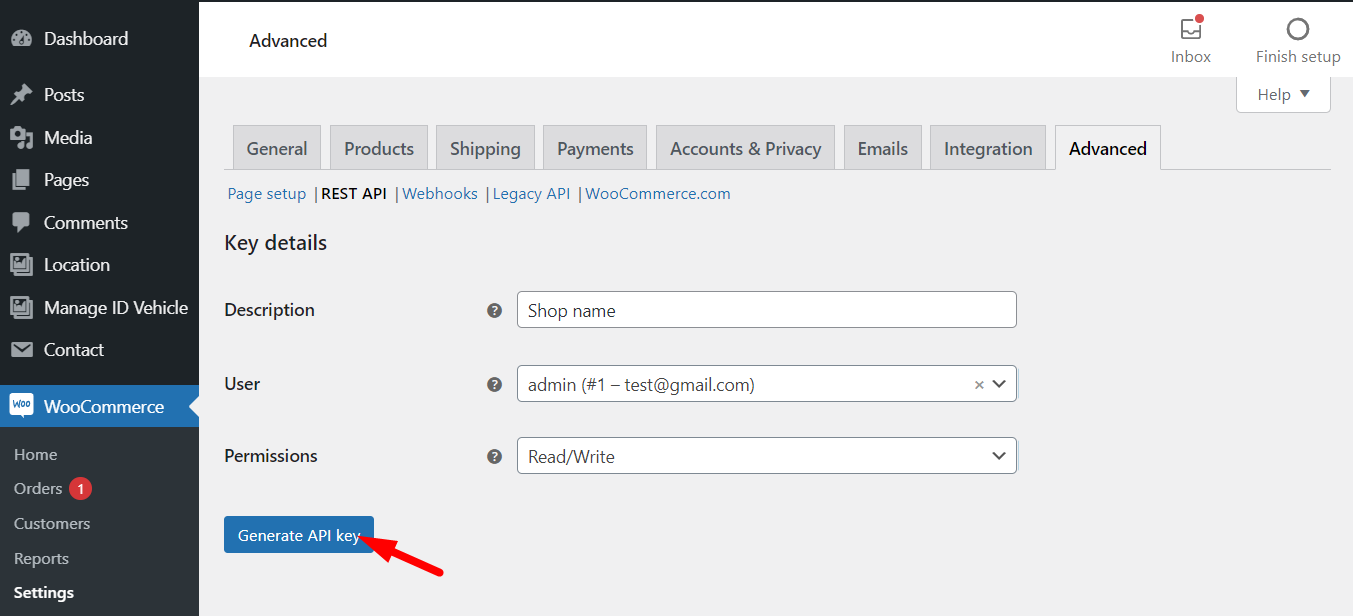
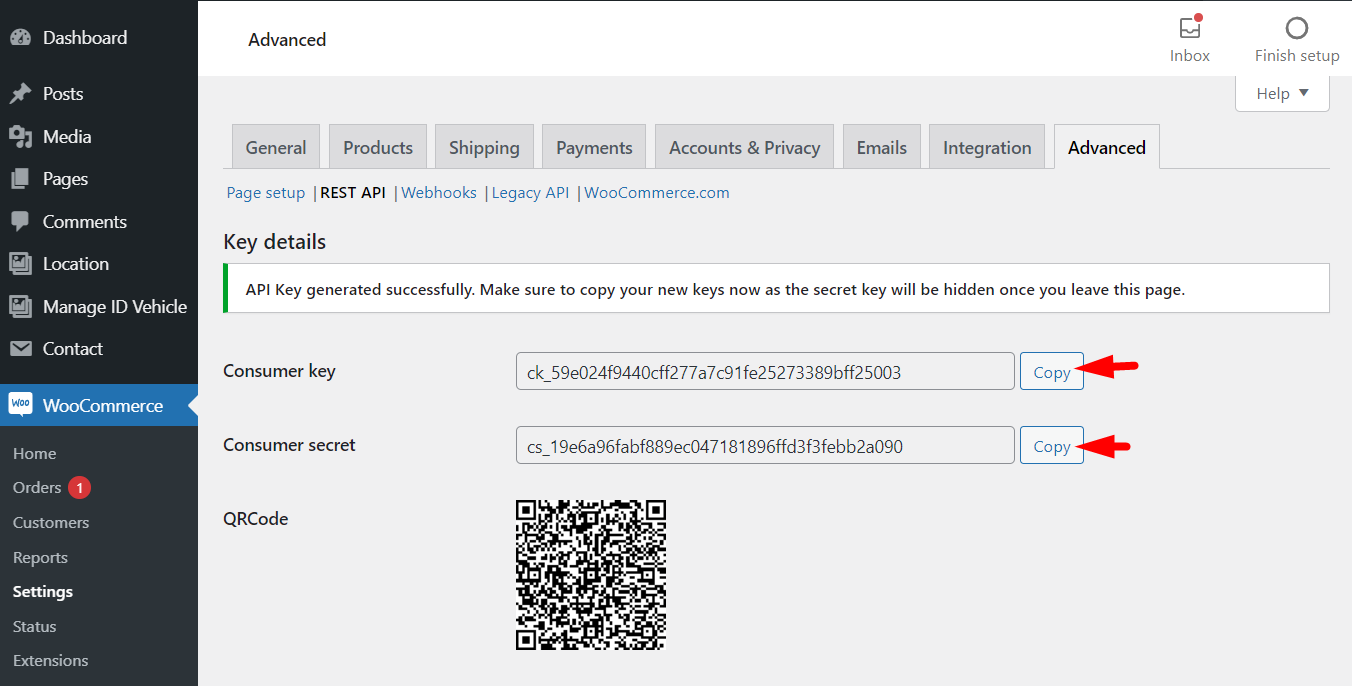
5. Copy the data
Consumer key and Consumer secret
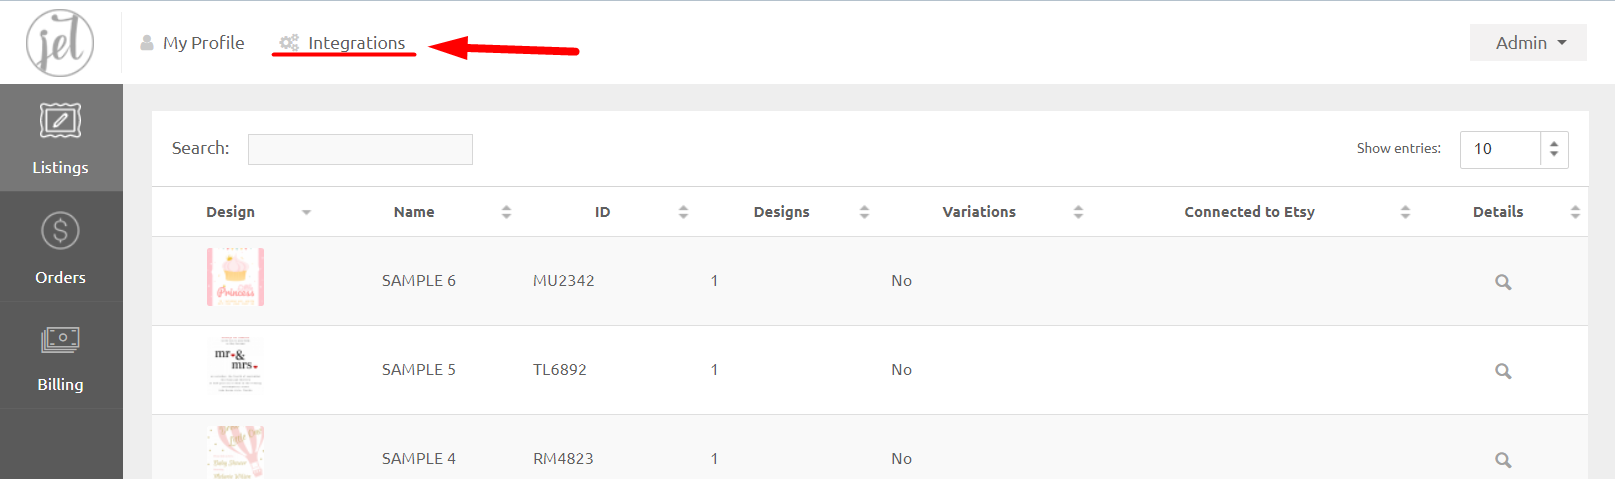
6. Go to the JetTemplate platform and chose the “Admin” mode by using the “Integrations” button
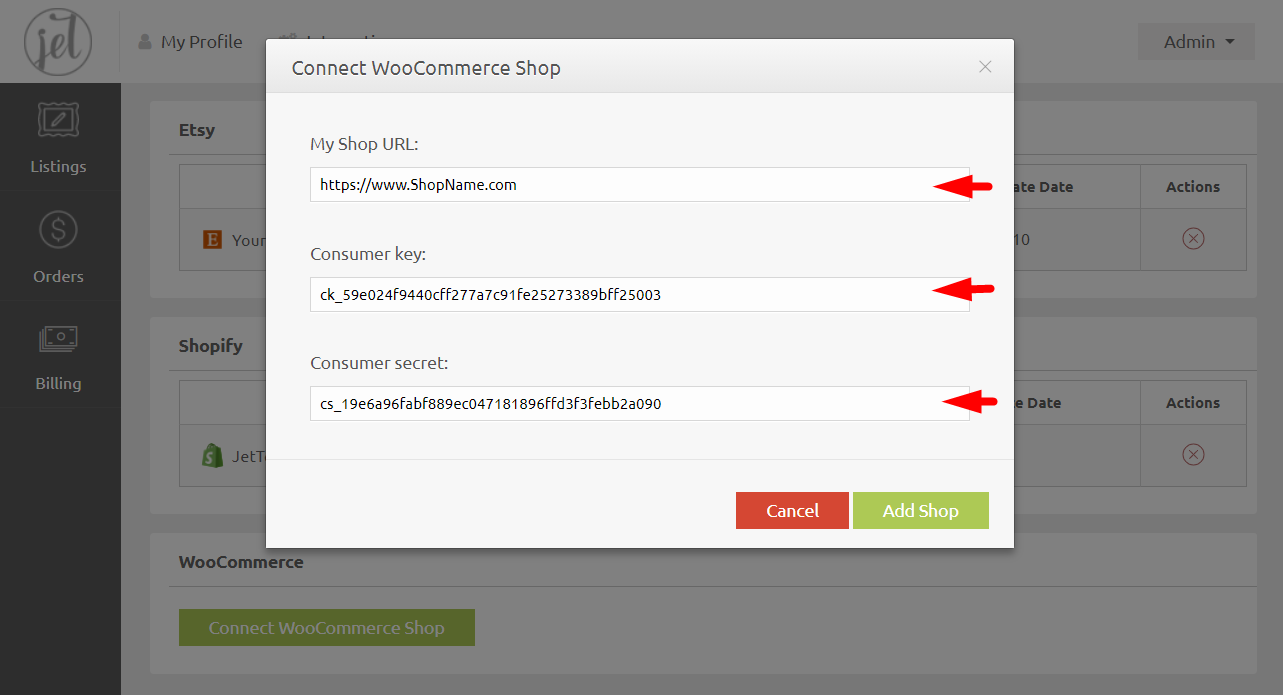
7.
My Shop URL: Insert the full address of your store (don't forget to specify https:// before WWW)
Consumer key: Insert the Consumer Key copied from Woocommerce (see Paragraph 5)
Consumer secret: Paste the Consumer Secret copied from Woocommerce (see Paragraph 5)
Click on “Add Shop“
If the integration was successful, such a window will appear in your account.

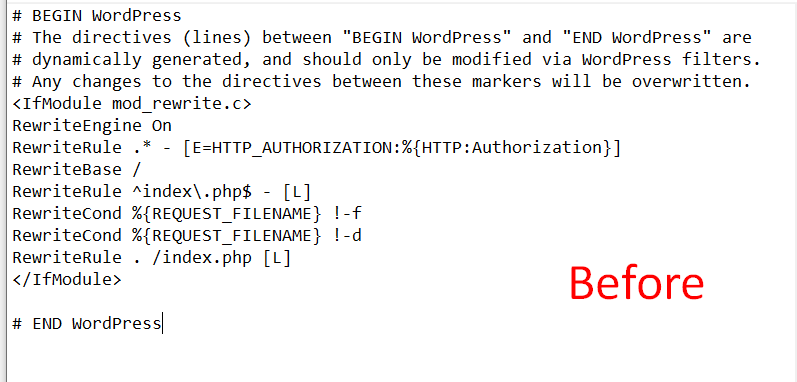
If you are having problems connecting your WooCommerce site to JetTemplate, you may need to make a change to the .htaccess file in your root directory. You will need to add the following lines to the codes (copy and paste):
SetEnvIf Authorization "(.*)" HTTP_AUTHORIZATION=$1
RewriteCond %{REQUEST_METHOD} OPTIONS
RewriteRule ^(.*)$ $1 [R=200,L,E=HTTP_ORIGIN:%{HTTP:ORIGIN}]]
Header set Access-Control-Allow-Origin "*"
Header always set Access-Control-Allow-Credentials "true"
Header always set Access-Control-Max-Age "1000"
Header always set Access-Control-Allow-Headers "X-Requested-With, Content-Type, Origin, Authorization, Accept, Client-Security-Token, Accept-Encoding"
Header always set Access-Control-Allow-Methods "POST, GET, OPTIONS, DELETE, PUT"
Added directly above the “# BEGIN WordPress” line (see images).
PLEASE NOTE: Any errors (including misspellings or bad settings) made to the .htaccess file can result in your website not loading properly or at all. We recommend that only advanced users make changes to this file and are not responsible for any problems that may occur from improperly editing this file.